Introduction: The Ultimate Home Storage Solution
Homeowners frequently find that traditional garden sheds and garage corners run out of space. Overcrowded closets and cluttered driveways make daily routines frustrating and disorganized. A heavy-duty steel box offers an ideal solution for expanding your storage capacity.
Steel containers are designed to endure severe weather conditions without structural failure. Their solid framing keeps out moisture, wind, and pests better than wooden structures. Converting one into a personalized storage room adds real utility to your property.
The conversion process requires careful planning, proper site preparation, and basic tools. By taking a methodical approach, you can complete this project on a realistic budget. This step-by-step tutorial walks you through every essential phase of the project. Using established shipping container providers such as Dry Box is the best way to insure quality.
Step 1: Choose the Right Dimensions and Placement
Selecting the correct structure begins with measuring the physical layout of your yard. You need to confirm that delivery trucks have enough clearance to maneuver safely. Researching standard shipping container sizes helps you decide between twenty-foot and forty-foot models.
Height options vary between standard eight-foot-six-inch models and taller high-cube units. High-cube options give you extra vertical room for tall shelving racks or overhead lofts. Take time to check local zoning laws and homeowners association regulations beforehand.
Permit requirements often depend on total square footage and property boundary setback limits. Verifying these legal details prevents costly fines or forced structural removal later. Once you secure permission, mark out the target footprint with stakes and string.
Step 2: Prepare a Stable Foundation
A level foundation is critical to ensure double doors open and close smoothly. Placing a heavy unit directly onto soft soil causes uneven settling and rust problems. Ground movement can warp the frame and bind access doors against the surrounding steel.
Crushed gravel pads serve as one of the most practical residential foundation choices. Excavate six inches of topsoil, lay geotextile fabric, and compact several gravel layers. This setup provides solid drainage while keeping groundwater away from the base frame.
Concrete footings or solid blocks placed under the four corners offer another great method. The main weight of the structure rests almost entirely on its heavy corner castings. Elevating the unit off the ground encourages air circulation underneath to prevent rust.
Step 3: Inspect and Upgrade Your Structure
When your container arrives, perform a detailed inspection of all interior and exterior surfaces. Check for severe rust spots, deep wall dents, and damaged rubber door gaskets. Selecting a clean box ensures your stored items stay protected from rain and moisture.
Treat any existing rust immediately using a wire brush and zinc-rich rust primer. Patch small holes or thin metal areas with heavy silicone sealant or welded patches. Inspect rubber door seals carefully to guarantee a tight seal around the main entryway.
Applying high-quality marine-grade or elastomeric exterior paint adds extra weather protection. Light paint colors reflect solar heat and help maintain cooler interior summer temperatures. Taking care of structural repairs early extends the overall lifespan of your investment.
Step 4: Install Essential Ventilation and Moisture Control
Steel structures trap air and can turn humid without adequate internal cross-ventilation. Temperature swings cause condensation to collect on internal metal walls and ceiling panels. This moisture leads to mold growth, odors, and rust damage on stored belongings.
Installing passive air vents near top and bottom walls creates active air circulation. Louvered vents equipped with insect screens keep rain and unwanted pests outside. Position vents on opposite sides to maximize natural wind movement through the room.
For regions with high humidity, installing a solar-powered exhaust fan provides continuous airflow. Dehumidifier units or simple moisture absorber buckets also help maintain dry conditions. Proper airflow keeps cardboard boxes, tools, and furniture in excellent condition year-round.
Step 5: Frame and Insulate the Interior
Insulating the walls regulates internal temperatures and prevents interior wall condensation. Before adding insulation, build an internal frame using metal studs or wooden two-by-fours. Attach framing members directly to internal steel ribs using heavy self-tapping screws.
Closed-cell spray foam insulation serves as the most effective moisture barrier available. Spray foam adheres tightly to corrugated metal surfaces, eliminating troublesome air gaps. It delivers high thermal performance while taking up minimal interior floor space.
Rigid foam board insulation offers a cost-effective alternative for budget-conscious builders. Cut foam panels tightly between framing studs and seal all seams with foil tape. Cover insulated walls with plywood sheets or OSB panels for a finished interior.
Step 6: Add Power and Interior Lighting
Adequate lighting makes finding stored items easy during nighttime or overcast weather. Running electrical wiring allows you to power light fixtures, tools, and climate devices. Hire a licensed electrician if you are unfamiliar with local building electrical codes.
Install a weather-resistant subpanel or connect a heavy-duty inlet plug to your power grid. Run electrical conduit along wall framing before closing up interior wall panels. Bright overhead LED strip lights illuminate deep corners without drawing excessive current.
Place wall outlets near workbench zones and primary entry points for maximum convenience. Solar-powered lighting kits offer a simple off-grid option if utility connections are impractical. Good illumination turns a dark container into a safe, functional work environment.
Step 7: Customize Storage Layout and Shelving
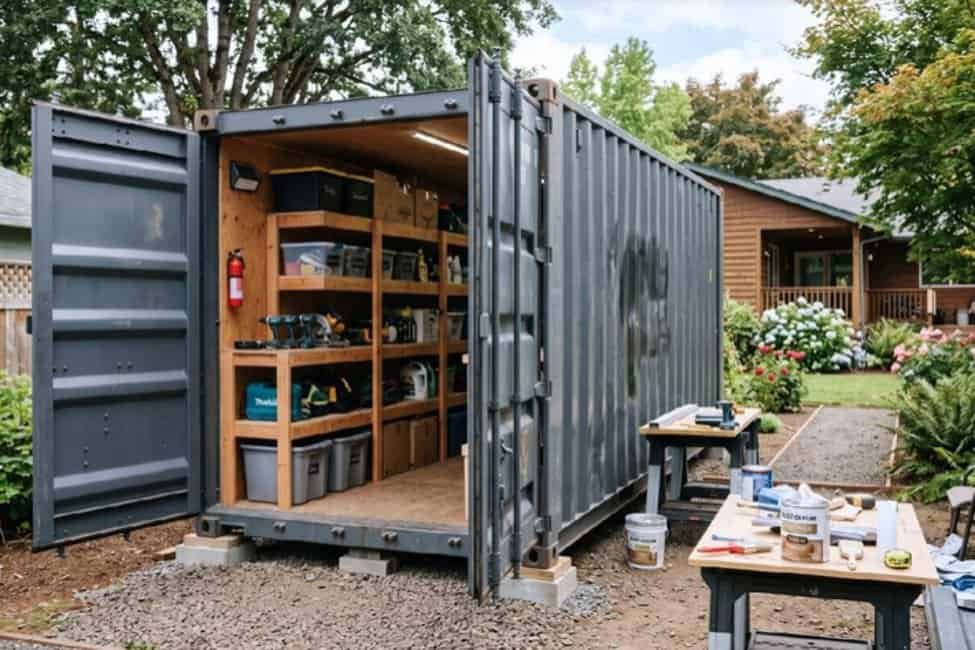
An organized layout optimizes usable volume and keeps floor space clear for walking. Wall-mounted shelving units keep heavy plastic storage bins stacked neatly against side walls. Heavy-duty steel rack systems handle substantial weight without stressing structural panels.
Utilize vertical height by mounting hanging hooks or overhead racks from ceiling beams. Ceiling racks work exceptionally well for storing ladders, seasonal gear, and long materials. Labeling storage bins clearly saves valuable time when searching for specific items.
Designate a central aisle down the middle for easy access to rear items. Leave breathing room around stored items to allow healthy air circulation throughout. A well-planned layout transforms simple square footage into an efficient organizational hub.
Conclusion: Enjoy Your Custom Storage Space
Building a home storage unit from a container provides exceptional durability and security. With correct site preparation, insulation, and smart layout design, your unit lasts decades. You now possess an affordable, weatherproof expansion that keeps your home clutter-free.
Taking time to complete each step properly ensures your belongings remain fully protected. Start planning your site layout today to turn unused yard space into functional storage. Your custom project stands ready to serve your household needs for many years.