That cedar-scented great room you imagine—with sunlight skimming a vaulted beam—starts with paperwork, not carpentry.
Before the first post is set, every new home in British Columbia must clear the local building-permit gatekeeper; permits protect safety, confirm compliance with the 2024 BC Building Code, and secure your home’s legal footing (BC permitting overview).
We’ll guide you step by step, spotlighting the quirks of heavy-timber construction and showing where smart engineering and energy choices pay off.
Ready? Let’s turn those dream timbers into an approved set of plans.
What makes a home “post-and-beam” and why that matters
Picture a skeleton of oversized timbers, vertical posts paired with hefty horizontal beams that carry the structural load while light infill walls simply close the envelope. That arrangement is post-and-beam at its purest: fewer studs, wider open spans, and cedar or Douglas-fir members that stay proudly on display.
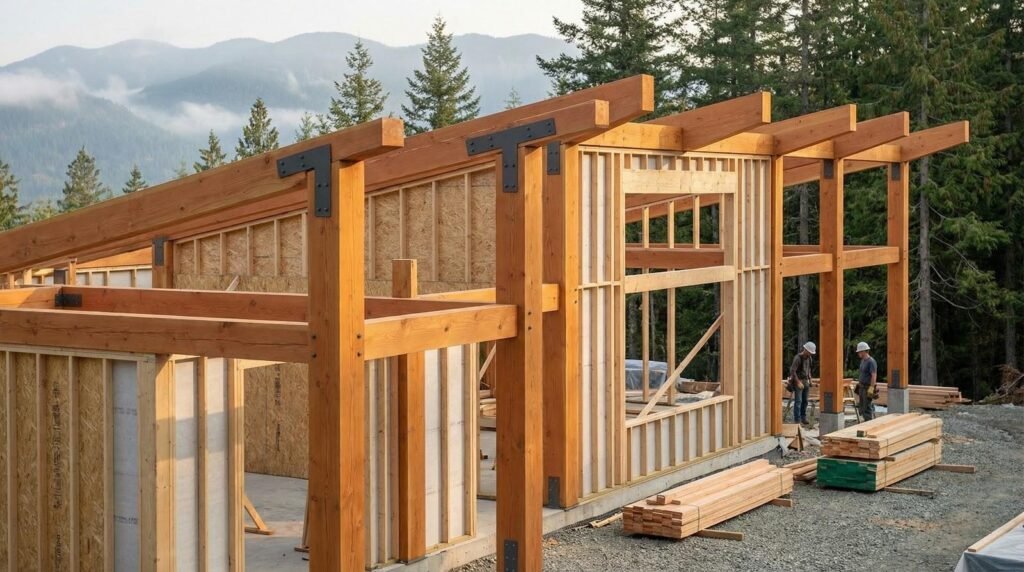
Because the frame does the heavy lifting, you can carve out vaulted ceilings, window walls, and free-flowing interiors that standard two-by-six stick framing often struggles to match. The result evokes the retreat-style homes that dot West Coast and mountain communities across British Columbia. Where timber-frame buildings hide wooden mortise-and-tenon joinery inside the frame, most post and beam homes call on exposed steel knife plates or through-bolts to lock the hefty members together. The hardware-driven approach speeds assembly and simplifies structural engineering for today’s seismic and snow-load demands.
What does that mean for permits? In the eyes of provincial officials, these homes are still ordinary wood buildings. The 2024 BC Building Code already anticipates large-section timber; it simply asks you to document structure, energy performance, and fire safety. Provide that evidence and a post-and-beam design moves through the same permitting channel as any other custom house.
Need ideas? Browse project galleries from leading BC timber specialists such as Hamill Creek Timber Homes. The Kootenay-based firm shares build diaries and leads clients through a five-step design path that ends with permit-ready construction drawings stamped by provincial engineers, so building officials see every beam calculation up front. Its Princeton residence gallery, for example, pairs photos of curved hammer-beam trusses with the engineered details that carried the home through review.
The style may be bold, yet the rules remain straightforward. Master the paperwork first and those striking timbers are yours to celebrate.
The regulatory backbone you must answer to
Every timber dream still passes through the same legal funnel: the 2024 BC Building Code, which sets minimum standards for structure, fire safety, plumbing, and energy use. Municipal staff enforce it, but they cannot rewrite it, so a post-and-beam on a Gulf Island faces the same technical rules as a timber chalet in Revelstoke.
Local governments remain important. They control zoning, lot coverage, height, and sometimes character guidelines. A lakeside parcel zoned Rural Residential may welcome your heavy-timber getaway, yet the same design could be shortened in a downtown heritage district if height caps or view-line rules apply. A five-minute call with the planning desk can save weeks of redesign.
A second provincial layer sits quietly in the background: the Homeowner Protection Act, enacted in 1998. Before any building department issues a permit, it will ask for proof of 2-5-10 new-home warranty coverage, or an Owner-Builder Authorization if you plan to manage the build yourself. The rule protects future buyers and shields you from major defect costs. Without that registration number, the permit application stops no matter how polished your drawings look.
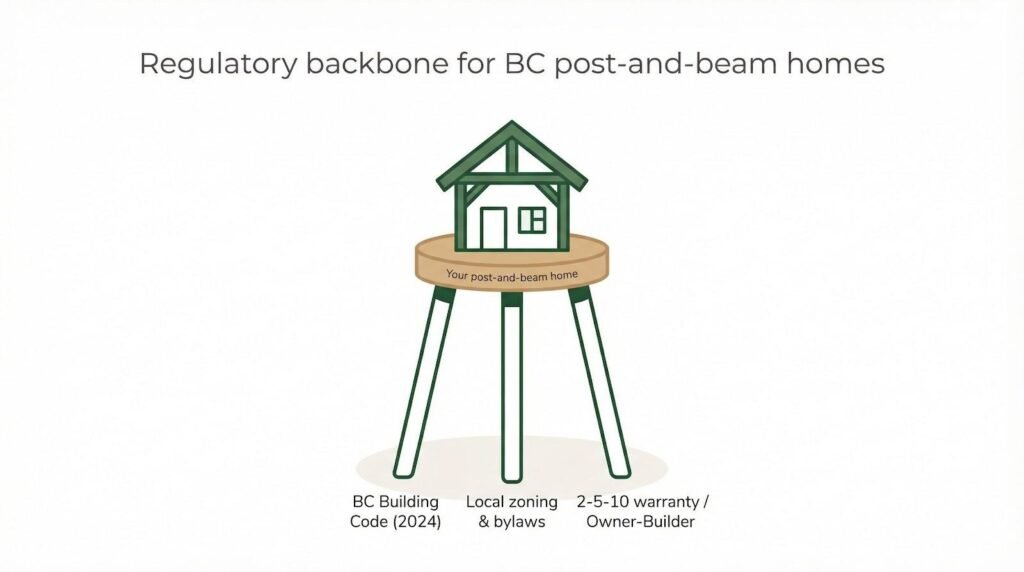
Think of the process as a three-legged stool. The Building Code tells us how to build safely. Local bylaws decide what fits the neighbourhood. The warranty program confirms that qualified hands will carry out the work. Secure all three, and you have a clear path from paper to posts.
Pre-permit planning checklist
Great builds start long before you click “Submit” on a permit portal. Real groundwork begins the moment you stand on your lot and ask, “What does this site need from my design?”
First, read the land. Steep banks, streams, or wildfire-interface zones can trigger extra studies or development permits. A five-minute chat with planning staff confirms whether you need a geotechnical report, a riparian setback, or a simple site survey.
Next, sketch with the Code in mind. Keep bedroom windows large enough for egress (0.35 m² clear opening), stairs comfortably shallow, and guards at least 42 inches high. These details feel minor until a plan checker red-lines them and your timeline slips a month.
Heavy timbers call for early structural input. Invite a structural engineer while the layout is still flexible. They will size the beams, specify steel brackets, and make sure point loads land on footings, not unsupported slab. Early engineering beats scrambling for fixes once drawings look finished.
Energy performance now carries equal weight. Province-wide Step 3 (effective January 1, 2023) is the new floor, so an Energy Advisor is your best ally. Share your concept of tall glazing and vaulted ceilings, and let them model the envelope before you commit to a layout the Code would refuse.
Finally, budget for soft costs. Surveys, engineering letters, energy modelling, and permit fees can add 5–10 percent to the total build cost. Plan for them early and you protect the construction budget that turns timber dreams into reality.
Handle these tasks before a single line hits the application form, and the permit stage becomes a formality rather than a hurdle.
Applying for the building permit, step by step
With site studies complete and drawings roughed out, it is time to go official. The building-permit application is where your timber vision meets a municipal checklist. Treat the exercise like a job interview: deliver a complete, professional package and the answer is almost always yes.
Start with polished drawings. Provide two identical sets (digital or paper, depending on the office) that show floor plans, elevations, sections, and construction details. Call out every beam by size and species, show each post landing on a footing, and list insulation values in wall legends. Attach the structural engineer’s stamped drawings and schedules so reviewers see immediately that the heavy timbers have professional backing.
Slip in the energy report next. Your Energy Advisor’s model proves the house meets Step 3 of the BC Energy Step Code. Include the summary sheet with predicted airtightness and annual energy demand; plan checkers usually flip to that page first.
Add support documents: the site survey that marks setbacks, a geotechnical letter if slopes required it, and the New-Home Registration certificate showing warranty coverage or Owner-Builder approval. Round out the bundle with the application form, construction-value estimate, and any plumbing or driveway forms the municipality lists online.
Submit the package in person or through the province’s Permit Hub portal. Expect to pay an intake fee of roughly CAD 300 – 600, then watch the file move through zoning, building, and engineering desks. Reviewers may ask for a guard-height detail or bracket calculations on that 12-foot ridge beam. Respond quickly; momentum matters.
BC building permits and approvals overview page screenshot
Once every box is ticked, the office issues an invoice for the remaining permit fee (often about one percent of construction value) and releases the permit card. Along with it you receive an inspection schedule. Pin both sets of stamped drawings on site, post the card where it is visible from the road, and you are cleared to break ground.
A solid, error-free submission turns review from agony into a brisk administrative dance. Give officials the information they need up front and they reward you with an on-time green light.
From groundbreaking to final inspection
Permit in hand, we trade clipboards for carpentry, yet paperwork never fully leaves the site. The permit card lists checkpoints that keep officials, lenders, and insurers confident the build matches the stamped drawings.
The foundation inspection arrives first. Call it in at least 24 hours before concrete so the inspector can see footings, rebar, and the anchor bolts where each post will seat. Keep the engineer’s footing detail on site. One glance, one signature, and trucks can pour.
Framing follows. This is the reveal, the moment those oversized beams snap into place and the open volume finally feels real. The inspector walks the skeleton, checking bracket bolts, shear walls, and guard-rail blocking. If a field change occurs, such as upgrading a beam size, have the engineer email a letter confirming it meets or exceeds design to avoid delays.
Mechanical, plumbing, and electrical sign-offs slot between framing and insulation. Licensed trades book their own inspections, but you coordinate the sequence so walls close only after every wire, pipe, and duct earns approval.
Energy compliance comes next. A mid-build blower-door test should hit Step 3’s target of 2.5 ACH50 or better. Catch leaks while they are easy to seal and the final test becomes routine, not a cliff-hanger.
Final inspection feels calm. Smoke alarms chirp, guardrails stand firm, and exit doors swing free. With each box checked, the inspector signs the occupancy certificate. That single sheet turns a jobsite into a legal dwelling, ready for furniture, mortgage draws, and years of timber-framed stories.
Stay organized and communicate changes quickly, and inspections become steady mile markers, not roadblocks, on the journey to move-in day.
Special considerations for post-and-beam homes
Structural timber: grading counts
Reclaimed barn beams look charming, but a building official cares about one thing first: a grade stamp or an engineer’s letter that proves each piece can carry the load. British Columbia treats timber like any other structural material; its strength must be verified, documented, and filed with the permit set.
If you buy fresh-sawn Douglas-fir from a local mill, ask a certified grader to stamp every member before it leaves the yard. Planning to reuse old timbers instead? Budget for an engineer’s visit. They will inspect, test where needed, and issue a letter that lists design values. Slide that letter into your drawings package and reviewers see compliant material, not a question mark.
Skipping this step delays framing inspections. Worse, it can force costly retrofits if an inspector refuses unverified wood already locked inside your walls. Confirm grading early and the rest of the timber checklist flows.
Engineered connections and lateral bracing
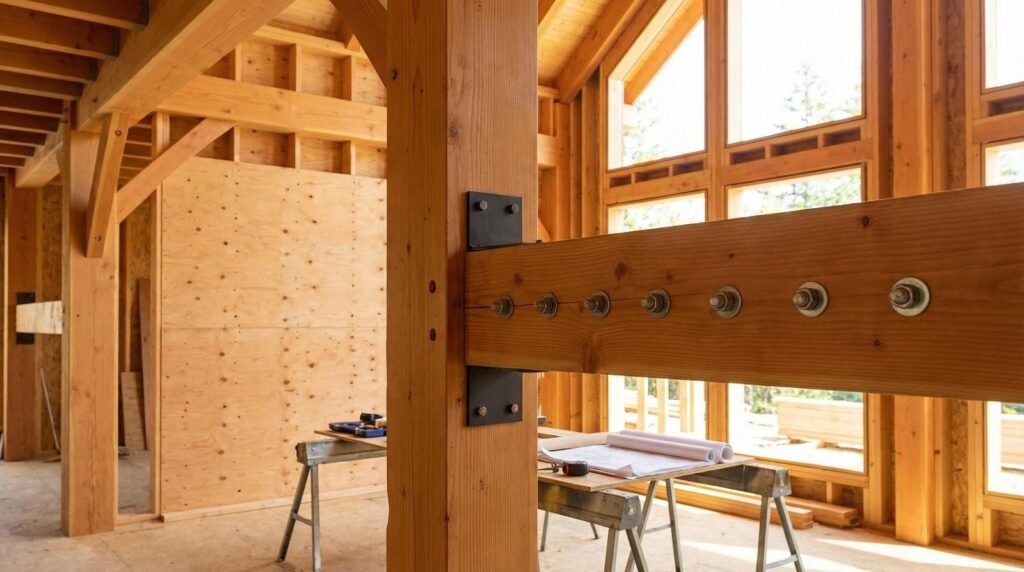
Posts and beams look solid, yet real strength hides in the steel you rarely notice. Knife plates, concealed brackets, 16-millimetre through-bolts, and sheathed shear walls work together to move gravity, wind, and seismic forces safely into the foundation. None of those details appear in prescriptive tables, so your permit depends on an engineer stamping every connection and bracing element.
During design, have the engineer coordinate with the timber supplier. They will size plates, specify bolt diameters, and call for corrosion protection that suits coastal humidity. Those specs land on the structural sheets, giving plan reviewers clear proof the frame can flex during a quake yet stay intact.
Open-concept living rooms often remove interior walls that stiffen a conventional house. Rather than sacrifice glass or headroom, the engineer can add moment frames, plywood-sheathed end walls, or tension cables hidden behind finish boards. The drawings verify that even with cathedral ceilings, the building meets the drift limits and wind loads in the 2024 Code.
On site, installers follow those details exactly. Inspectors check bracket models, bolt patterns, and nail spacing in shear panels. Keep a copy of the engineered sheets at the cutting table and snap photos before finishes hide the hardware. If any field adjustment is needed, call the engineer, get a quick revision letter, and keep inspections on schedule.
Solid steel, clear paperwork, and timely communication let your timber frame stand tall for generations.
Meeting step-code energy targets without sacrificing design
Large window walls and soaring ceilings define post-and-beam style, but they bleed heat if we ignore the 2023 update that pushed all new Part 9 homes to Step 3. The solution is to shape the envelope so efficiency and aesthetics share the stage.
Start with glass. Specify triple-pane units with low-e coatings and insulated spacers. They maintain clear views while cutting heat loss enough to keep generous openings.
Next, move insulation outside. Continuous rigid foam or structurally insulated panels over the roof deck let rafters stay exposed indoors while the thermal layer wraps the frame. Apply the same treatment to walls with exterior insulation boards over infill studs to erase thermal bridges and simplify air-sealing.
Airtightness is the quiet hero. Tape or membrane every beam-to-wall joint before finishes go on. A mid-construction blower-door test should reach 2.5 ACH50 or better, leaving only minor touch-ups for the final test.
Mechanical systems close the loop. A properly sized heat pump delivers efficient heating and cooling without bulky duct runs that spoil sight lines. Pair it with a heat-recovery ventilator to bank Step-Code credits while keeping the timber dry.
Follow this recipe and your post-and-beam home glides through energy review with its glassy façade, and your comfort, fully intact.
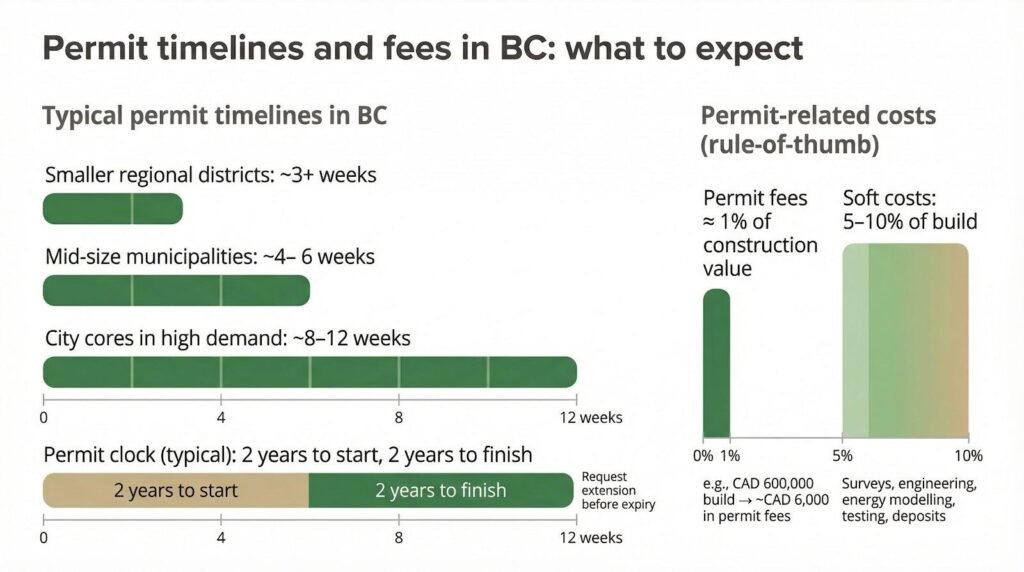
Permit timelines and fees in BC: what to expect
Time first. A tidy single-family submission in a mid-size municipality usually clears plan review in four to six weeks. City cores under heavier demand can stretch to two or three months, while smaller regional districts sometimes stamp a complete set in as little as three weeks. Build schedules rarely fail because permits take forever; they stumble when drawings ping back for missing details. Send a complete package and you control the calendar.
Money next. Most jurisdictions base fees on construction value, and one percent is a safe planning figure. On a CAD 600 000 timber home, that works out to about CAD 6 000, paid in two instalments: a modest intake fee at application and the balance upon approval.
Soft costs add another layer. Expect:
- Land survey and staking
- Structural and geotechnical engineering
- Energy modelling and blower-door tests
- Refundable site-damage deposits
Together these items can add 5 – 10 percent to the build. Budget early and they become line items, not surprises.
Finally, watch the permit clock. Many cities allow two years to begin work and another two to finish. Weather, finance, and supply chains can shift plans, so set calendar reminders six months before each deadline. Filing a short extension request costs far less than reapplying under a new code cycle.
Know the numbers, plan the cash flow, and permits shift from mystery expense to a predictable project cost.
Conclusion
Know the numbers, plan the cash flow, and permits shift from mystery expense to a predictable project cost.